Intro To Android Programming
Intro
What is Android?
Android is a Linux Kernel based operating system developed by Google. It originally started as a mobile OS, but has now expanded to:
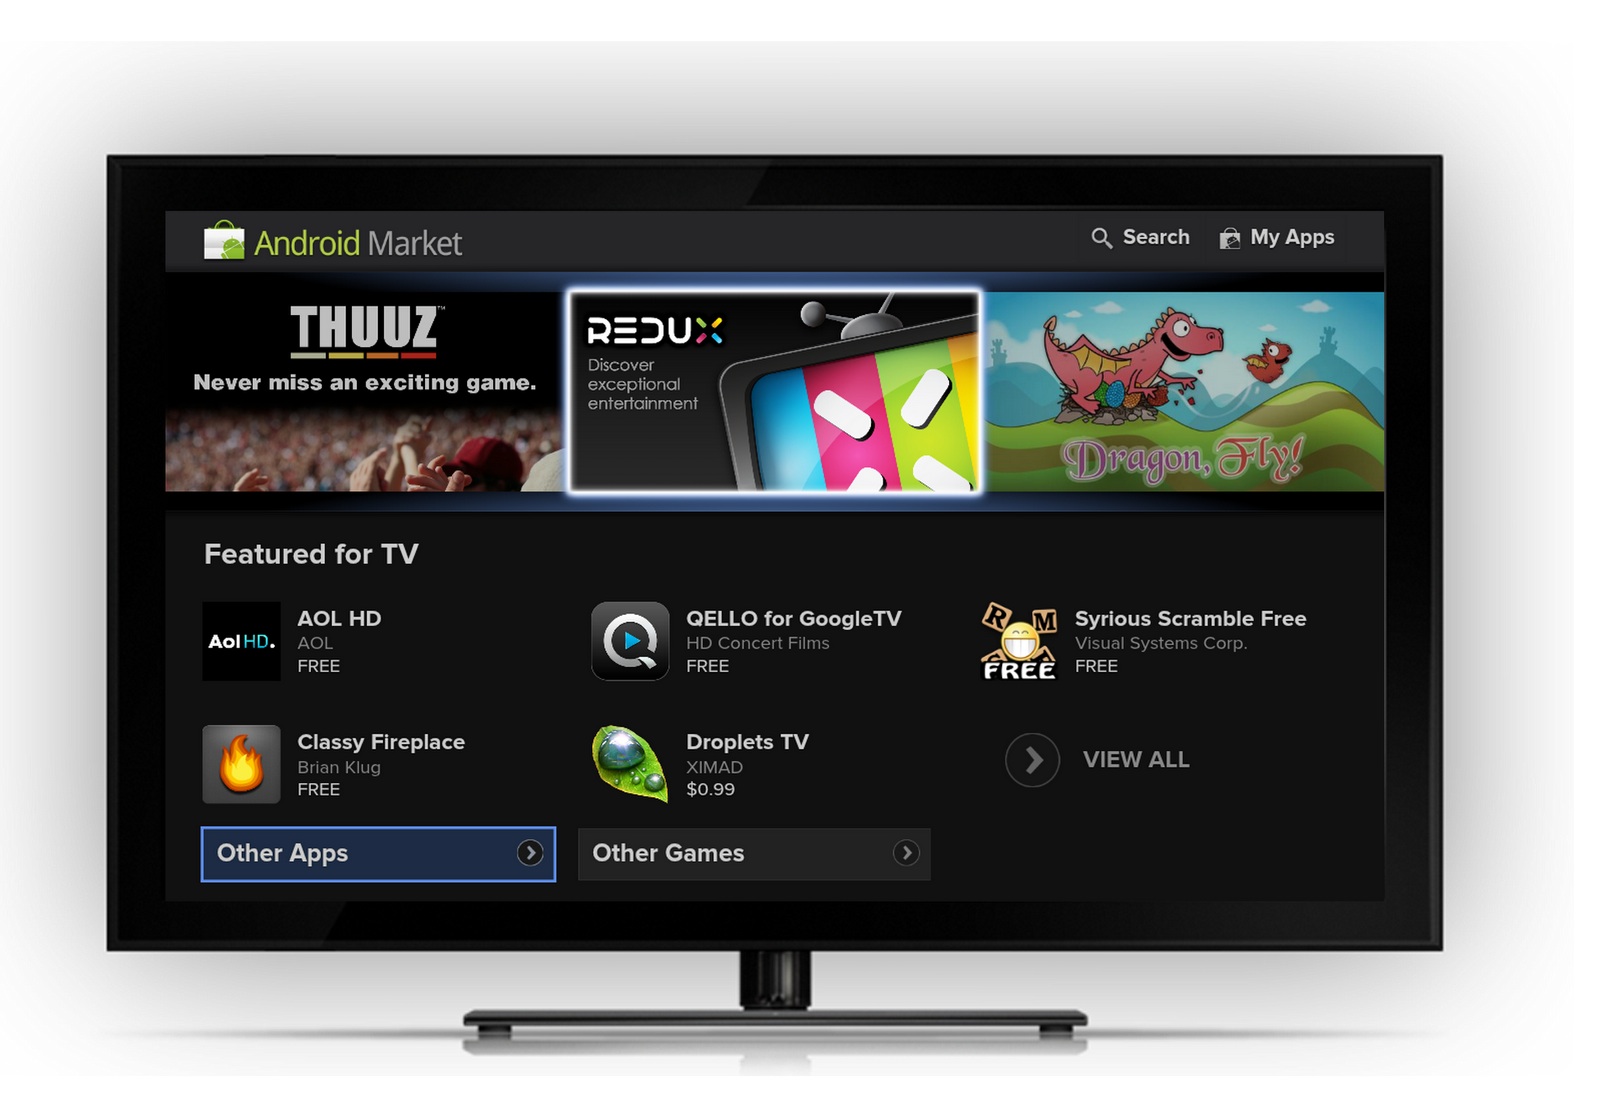
Android TV
Android Wear

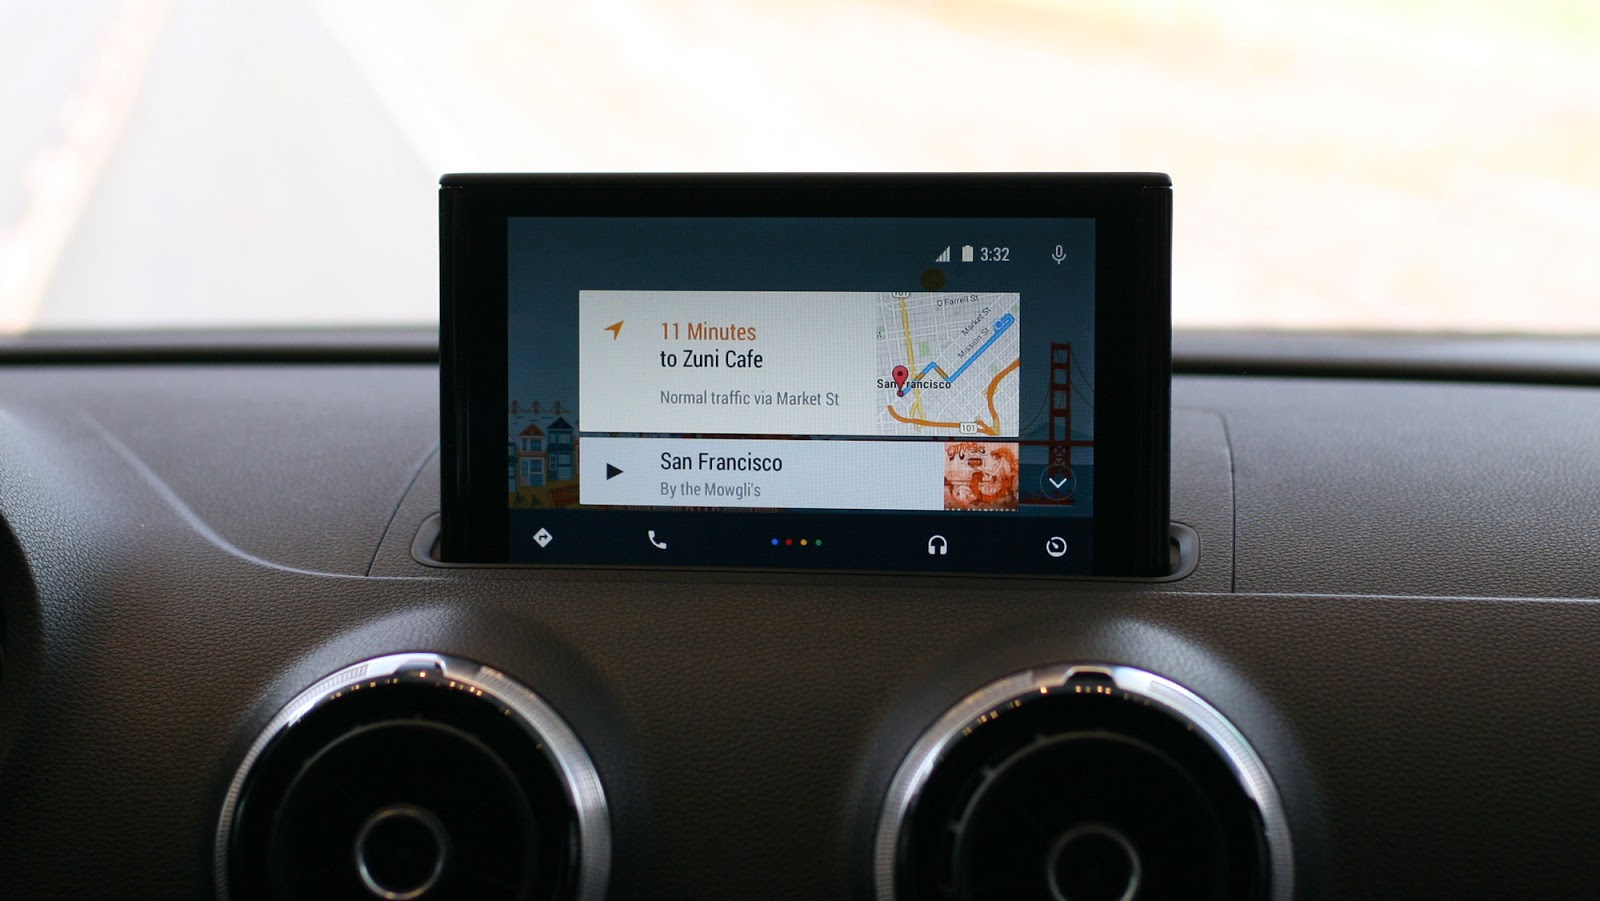
Android Auto
Why Android?
- Thousands of Unique devices supported
- Written in Java
- Amazing IDE
- Play store is more lax.
- Well documented
Getting Started
Development in android is done in Android Studio, a Google developed IDE that makes working on Android simple and fun! You should go ahead and snag the IDE online, or ask your local organizer for a preloaded thumb drive.
Resources
- Android Developer Guides
- Android Developer Training
- Tutorials on various topics
- Google is your friend! :D
- Stackoverflow is God!
Basic Structure of an App
What do these words mean?
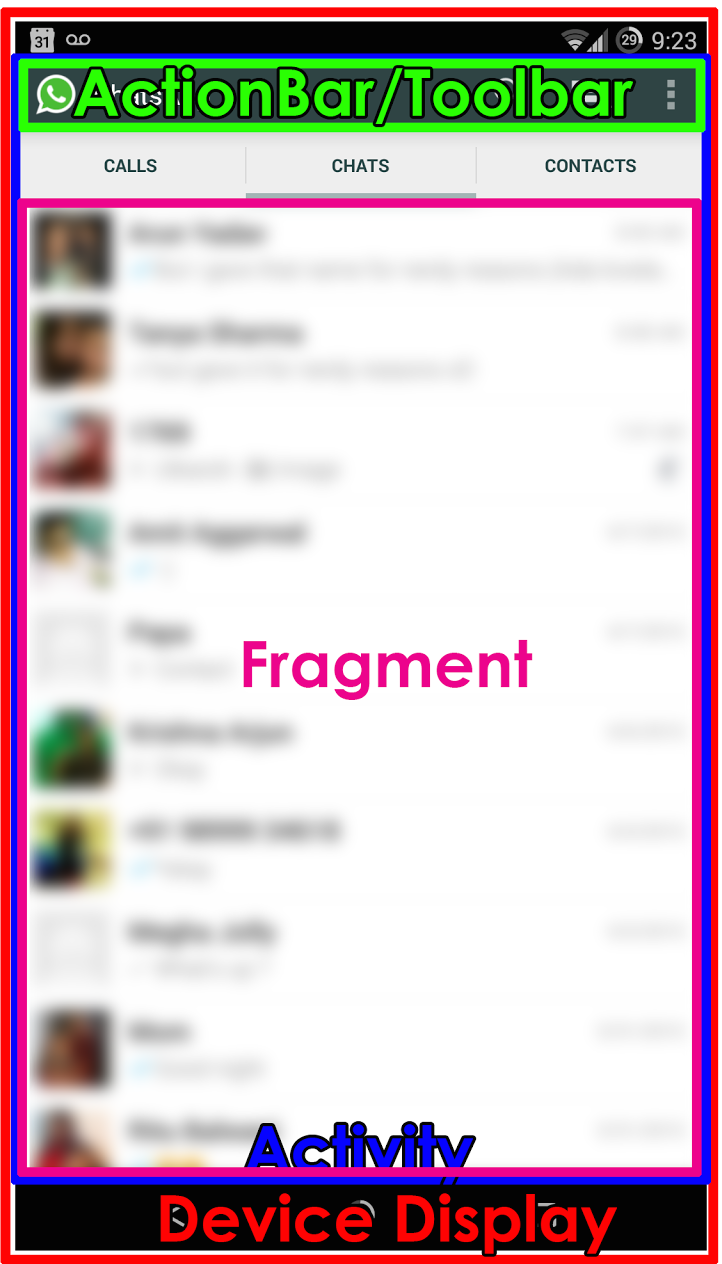
- Activity
- Activities are the basic building blocks of your
- Each screen in your app would be an activity
- Actionbar/Toolbar
- The toolbar at the top is known as the ActionBar (Renamed to Toolbar in Lollipop)
- It is optional, but useful
- Usually contains frequently needed actions and options menu and title
- Fragment
- Fragments are subsets of activities
- Multiple fragments in one activity
- Can be moved around to create Tabbed Layouts or NavDrawer Layouts
Lets start the tutorial
So, today we’ll be making an app called clickzilla which introduces you to making a basic activity, layout and using intents and also using the options menu. Here’s the completed code for this project for reference https://github.com/adibalwani03/ClickZilla
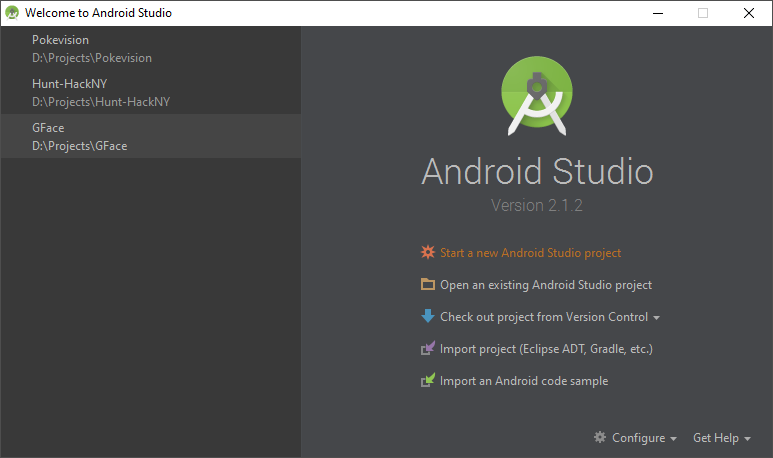
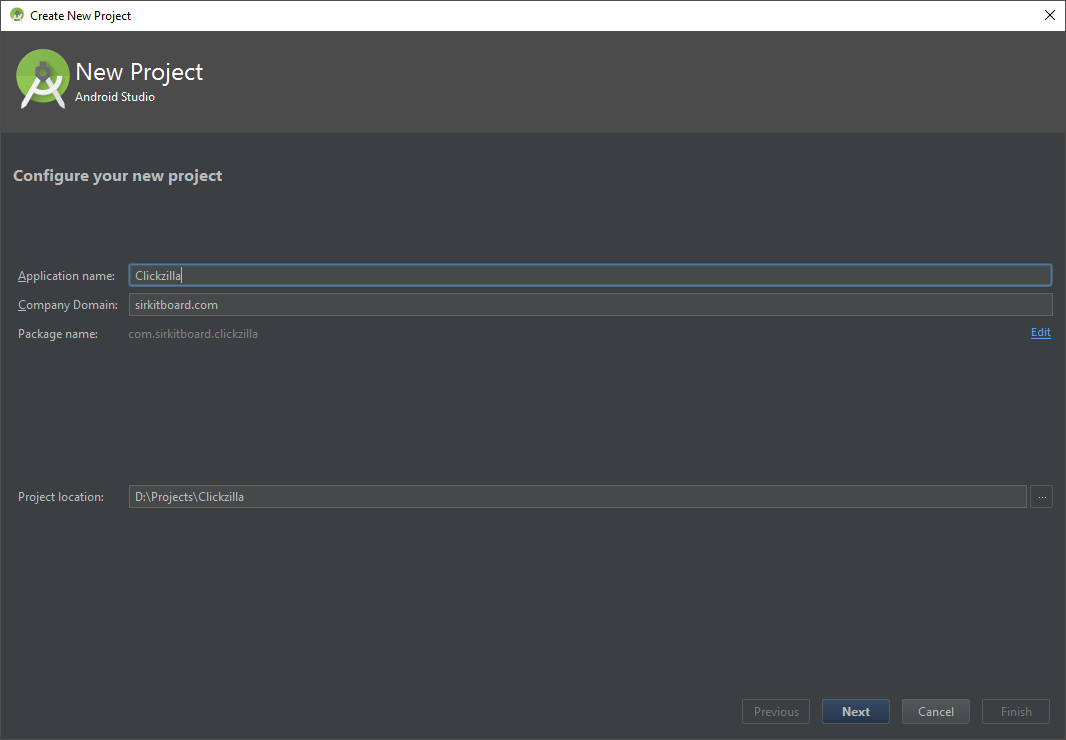
Create a New Project
- Lets create a new Project
- On the next screen you’ll be prompted for the following
- Name
- Package Name You can name these anything you want. I called the app ClickZilla and and the general convention for package name is com.<yourhandle>.<appname>
Name your application
On this screen you will enter your application name and your company domain. If you dont have a website then you can pick any domain but it should be unique because 2 applications with the same package name cannot exist.
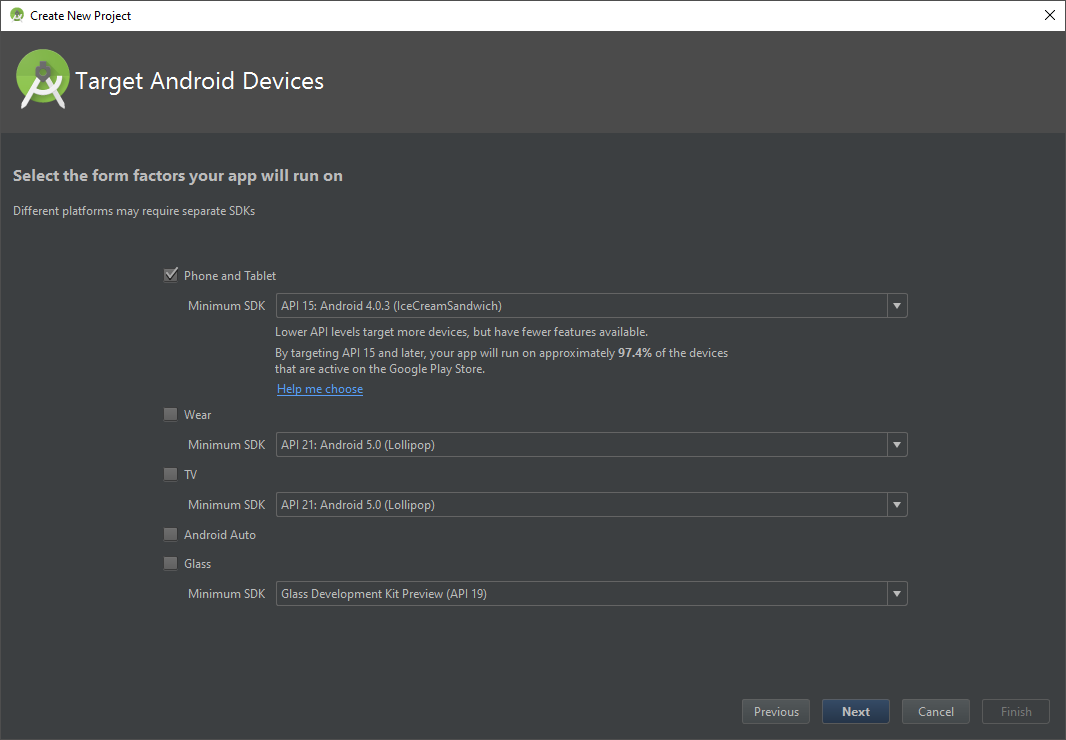
Support
You can support as many systems as you want. I tend to prefer supporting anything Android 4.0 or above.
Android 2.3 is now dead, so no need to support that and Android 3.0 is just plain weird so I like to pretend that never happened.
You can also add support for Google glass, TV, Auto and Wear if you want.
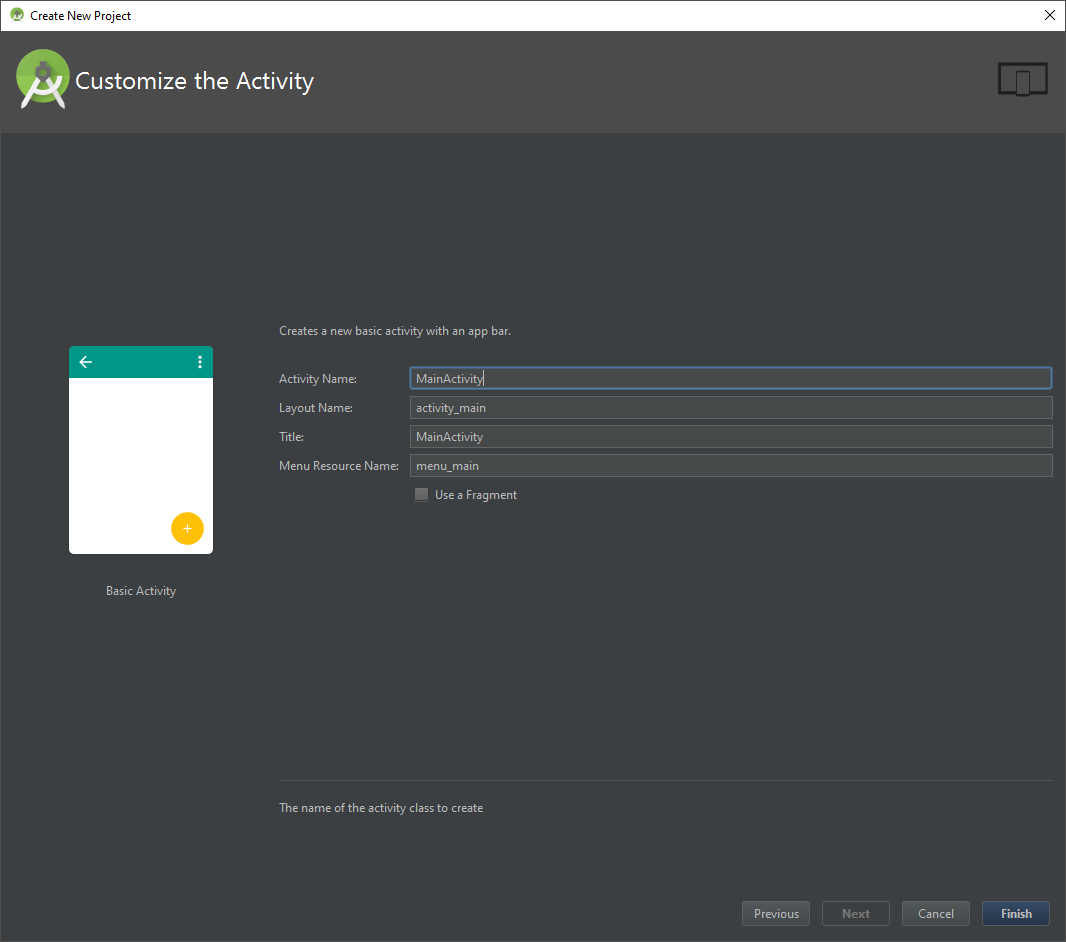
Activity Templates
And now you’ll be taken to the templates screen which contain prebuild activities you can use. For this one, we will be sticking to a basic activity but you can also pick blank activity which is just a basic activity without some of the boilerplate code. The other templates are for more specific situations but if any of them fit your app then you can choose that.

Activity Name
Now we give the activity a name. Again, usual convention is that the first activity the app is called MainActivity Or, if the app requires login then you can start at loginActivity or a DispatchActivity (which checks for already logged in users) But these are just conventions so you don’t have to strictly follow them
And now we wait
For a million years for gradle to get ready

Meanwhile…
What is gradle?
Gradle is the build system that Android Studio uses to build all apps. It is essentially a build automation system. In your build.gradle file you can declare dependencies, signing configurations for APK signatures, flavors of the app (Such as specific builds for different versions of Android, or debug and release flavors) Most of the time you will not need to make changes to build.gradle since Android Studio automates most of it (Automation for an Automation system, Yo Dawg!), but it is useful tool know to make certain things faster. For example, if you define a signing config for your release version in gradle, all you need to do is run “$gradlew.bat assembleRelease” and it will generate a complete signed APK.
Congratulations!!
You have completed your HelloWorld app.
Over the next few slides I’ll go over the automatically generated code and then we’ll start making changes
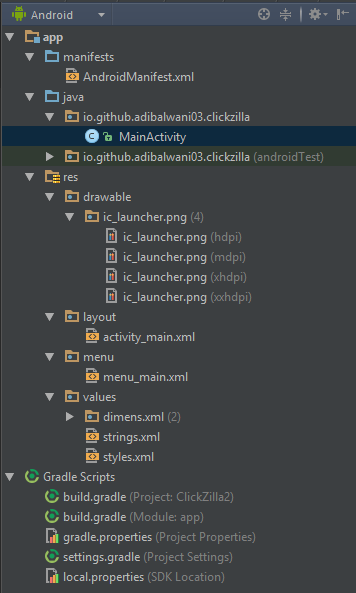
File Structure
Here you can see the basic file structure of your app. Each folder here has a specific purpose which the following slides will explain.
Manifests
The Manifests directory is where you declare your AndroidManifest.xml and any other manifests.
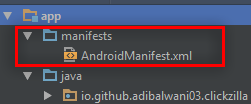
The purpose of the manifest is to specify things for the device including declarations of all activities, all permissions required (eg. Internet, Wifi, I/O), special hardware requirements (camera, flash, gyro etc) and certain google APIs (eg. maps) and other things that can possibly affect compatibility.
NOTE : Some of the tasks a manifest does is now also being done by the build.gradle such as declaring minimum android version
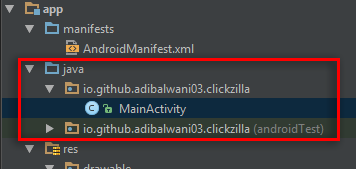
Java Packages
The java folder is where all your packages are declared, and inside those are all your java files. Most of your code would go in the main package.
I personally have never used the AndroidTest package, so I can’t say much on that, but i’m guessing its for making test cases for the app (If someone knows, do tell me and will update the project).
Res
The res folder is the real deal. This folder contains all the graphics+ui stuff of your app.
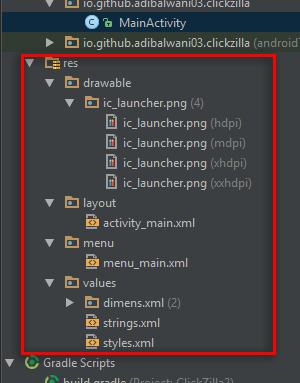
- Drawable This is where all images go. Real programmers create different sized of every image to reduce memory imprint on smaller devices, but i’m too lazy for that
- Layout This folder contains the xmls that define the layout of each activity
- Menu This folder stores all the menu options for various activities.
- Values This one contains all defined constants such as colors, themes, paddings, strings, ints etc Usually its a good idea to make another xmls that stores all your API keys and also add it to the .gitignore so you don’t end up accidentally committing them
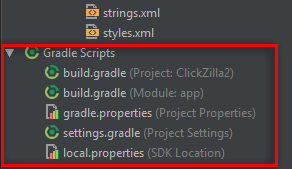
Gradle
This is where all the gradle files reside. Usually you’ll only be making small changes to the build.gradle in the App Module Other than that, its mostly left untouched
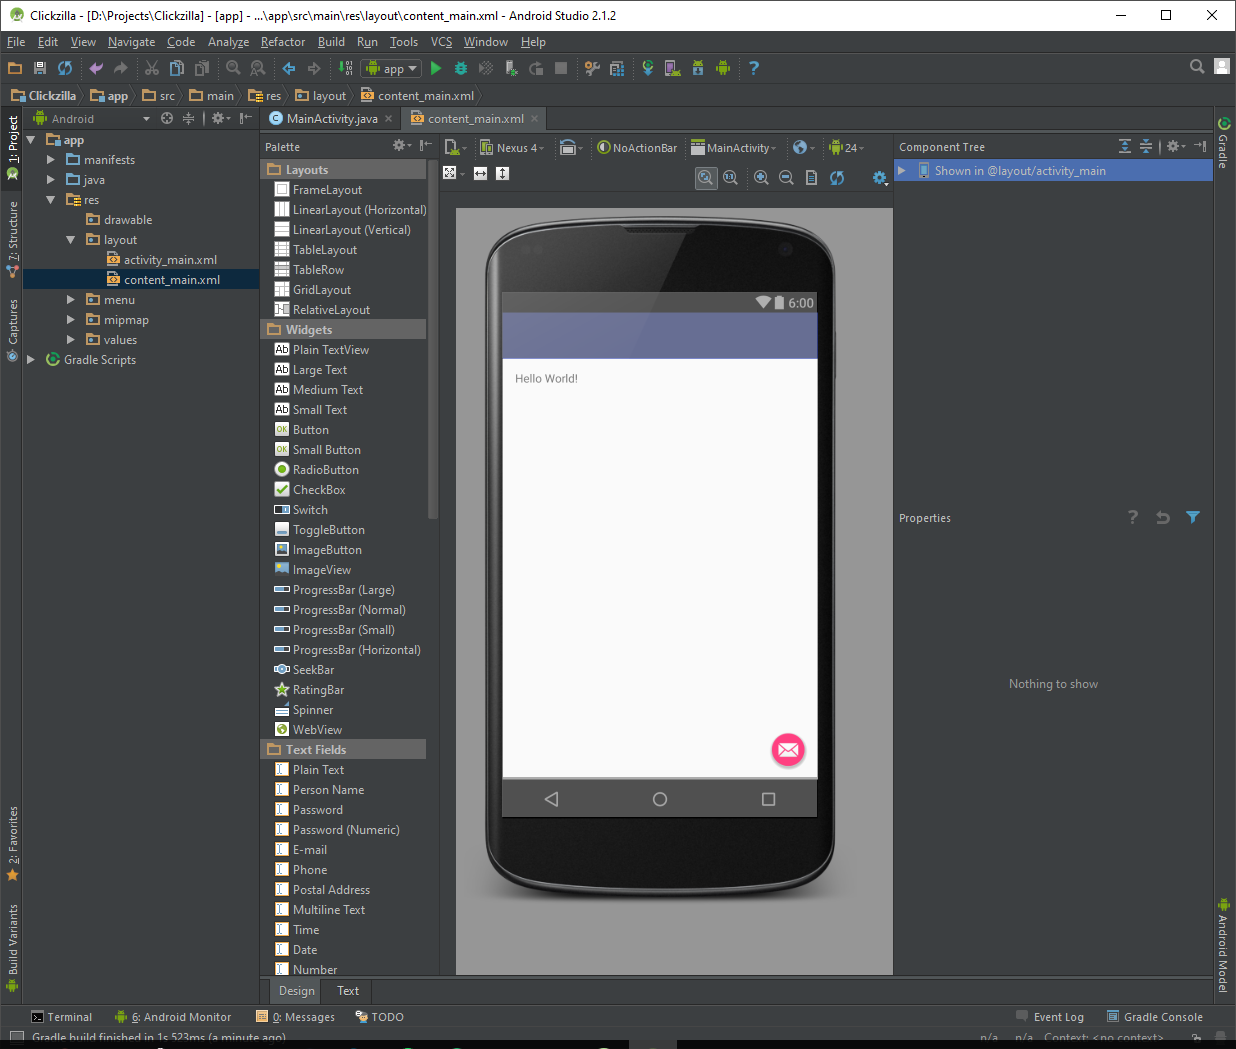
Layouts
Now lets head over the activity_main.xml content_main.xml and you’ll probably be brought the design GUI. From the left pane you can drag and drop objects onto the screen and the layout xml will automatically change to add the new item. Easy peasy stuff, but often annoying. And so we move onto the actual XML ->
activity_main.xml (text view)
So this XML is where your layout is defined. This file is used to define the outer structure of the activity. Going through it line by line we have :
- <?xml
- This is the xml version and encoding of the file.
- <CoordinatorLayout
- This is the declaration of the layout, which in this case is the Coordinator Layout. As the name suggests, this type of layout is to coordinate the movement of various views inside and moving the views in relation to each other. For example, you can make the toolbar shorter as you scroll down etc.
- <AppBarLayout
- This is the declration of the app bar of your app. The app bar contains the toolbar and anything else you want to keep inside it.
- <include
- This line tells android to include this other layout file in here. This is used to seperate the layout and keep the code clean and reusable.
- <FloatingActionBar
- The floating action bar, also known as a FAB is a button which is used to trigger the primary action of your app. For example, in Gmail its for composing an email, in a music app it can be to play a song etc.
content_main.xml (text view)
- <Relative Layout
- Another layout declaration, which in this case is Relative layout which means all objects are located in relation to a parent which is declared using android:layout_<position>=””
- I find this to be one of the easiest ways to declare a layout.
- Other popular layouts include LinearLayout, Frame, Grid and Table. You could also use ListView and ScrollView
- ignore the xmlns:android line, this is essentially the include of your layout, declaring the format the xml will follow and things you can place inside. You only need to do this for the Root and is often auto-generated
- android:<blah_blah>
- These are properties of whatever item is declared. Usually the name is fairly self explanatory and Android Studio has an amazing autocomplete system so you don’t need to remember the names of specific properies
- <TextView
- This is what currently holds your “HelloWorld” text. We’ll be changing it later.
MainActivity.java
The autogenerated java code. It contains the following things :
public class MainActivity extends AppCompatActivity- Declaration of your Activity and it inherits from AppCompatActivity (which in turn inherits from FragmentActivity which inhertis from Activity), which means you will have an Actionbar in your app and you can put Fragments in it too.
- You can change it to just Activity in which case it won’t have an actionbar or fragment support (which you don’t need for this one)
protected void onCreate(Bundle savedInstanceState)- This method is automatically executed when this Activity is created. It is essentially your constructor.
- setContentView(R.layout.activity_main);
- This line of code is what “inflates” your activity, which essentially means it takes the layout you specified (in this case, activity_main.xml) and creates your activity to look like the specified layout
Toolbar toolbar = (Toolbar) findViewById(R.id.toolbar);- Once the layout is inflated, you can acquire handles to the various objects in it. In this line we get an object of the Toolbar, and we can then programmatically affect it.
FloatingActionButton fab = (FloatingActionButton) findViewById(R.id.fab);- Same as above, we get an object of the FAB
fab.setOnClickListener(new View.OnClickListener() {- Set the action that should be performed when the FAB is clicked
public boolean onCreateOptionsMenu(Menu menu)- Similar to the previous method, this one inflates the OptionsMenu using the specified menu layout and is also called automatically
public boolean onOptionsItemSelected(MenuItem item) {- This method is called when the user presses an item in the OptionsMenu and the clicked item is referenced by the item parameter.
ClickZilla
So now we get to the actual coding. ClickZilla is a small app that introduces the following topics :
- Making changes to layouts and java files
- Displaying messages to the User
- Making new activities and linking to old one using Intents
- Adding items to the options menu and using them
ClickZilla Part 1
Adding a button and Showing messages to users
Modifying TextView
So lets start with adding a button to the content_main.xml. You can remove the existing textview if you want, or you can keep it, i’ll be keeping it for now, but changing the text to “Welcome To ClickZilla”. Also, if you’re keeping it, add the following lines of code to the textview declaration :
android:id="@+id/welcome"
android:layout_alignParentTop="true"
android:layout_centerHorizontal="true"
IDs are given to views to refer to them in the program or for layout purposes and the layout_lines are specifying that its center aligned and that its at the top of the screen
Adding a Button
Now, to add the button, add the following block of code inside the RelativeLayout :
    <Button android:layout_width="match_parent"
        android:layout_height="wrap_content"
        android:id="@+id/click"
        android:text="Click Me!"
        android:layout_below="@id/welcome"
        android:onClick="buttonClicked"/>
ID and Text do the same things as before, whats new is specifying layout_width and layout_height. Setting them to “match_parent” sets to the same size as that of the parent, while setting it to “wrap_content” makes sure the size exactly fits everything inside Another new thing is the layout_below, which tells the app that we want this button to be placed directly below whatever object has the id “welcome” And finally onClick is the magical part of Button. Clicking on this button will automatically a method of the same name as that specified in the onClick field. Neat! :-D
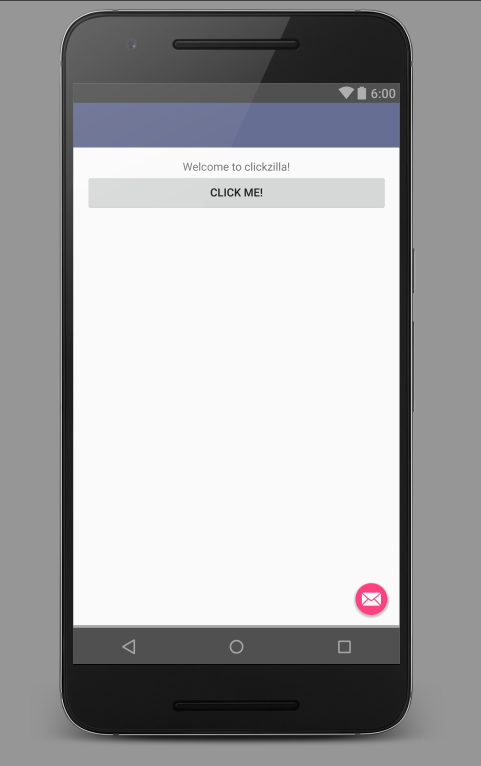
Layout Preview
At the end, if you go to your Design tab, your layout preview should look something like this
Making the Button Do Work
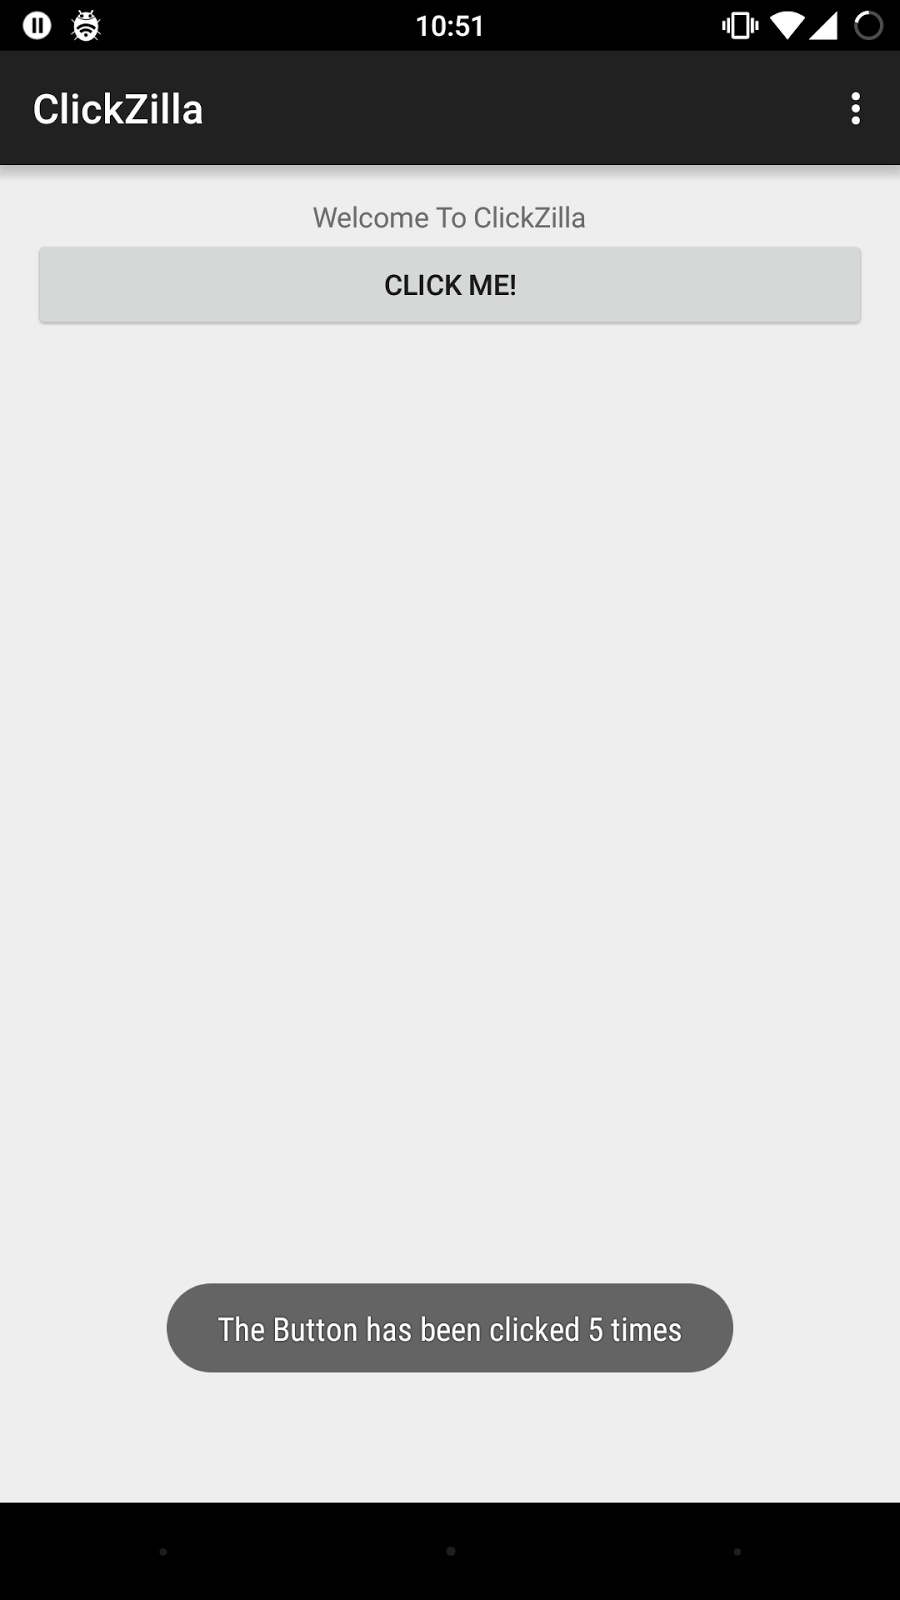
Now that we have a button that calls “buttonClicked” we need to write that method. We also need to provide feedback to the User to show something happened when the button is clicked. The purpose of the ClickZilla is to count how many times the button was pressed. So lets make counter in the MainActivity class.
int clickCounter = 0;To provide feedback we use an Android Library called Toast. Toasts a are small messages that fade in and out and are extremely useful for providing feedback. Now to create the method that reacts to the button press, add this to the MainActivity :
public void buttonClicked(View v) {
    clickCounter++;
    Toast.makeText(
        getApplicationContext(),
        "The Button has been clicked " + clickCounter + " times",
        Toast.LENGTH_SHORT
    ).show();
}
Whats new is the argument View v. Anything in your android application is a View. TextView, Buttons, Radios all are children of View. So in this case, the argument is just a reference to which button was clicked. But we don’t need that for now. Toast.makeText is the method used to make Toasts. It takes in three arguments, the first one specifies where the toast is displayed, which in this case is the application context. The second is the message to be displayed and the third is the length. Finally, you need to call .show() to actually display the toast but luckily Android studio is nice enough to warn you if you ever forget :)
Fun Fact : Toasts are called toasts because originally they would pop in from the bottom like a toast coming out of toaster!
Time to test the App!
But wait. How do I test my App? There are 2 easy ways of doing this!
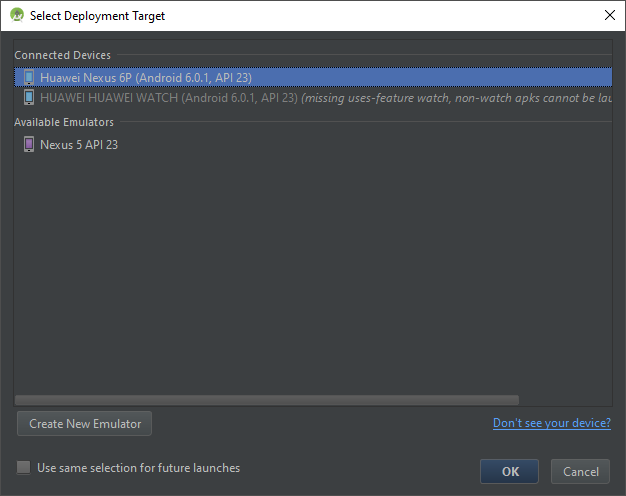
Method 1 : Android Debug Bridge
Android Debug Bridge aka ADB is a tool used to debug android applications (Surprise Surprise!). Of course you need an Android Device to do this. To get started, you need to have the Google Drivers which you can install from the SDK Manager. After that simply enable USB Debugging in your phone’s Developer options and connect it using USB and you’ll see a screen like this when you run the app.
Method 2 : Android Emulator
If you don’t have an Android Device, fear not! Android Studio comes to the rescue! Android Studio comes with an Android Virtual Device (AVD) (Assuming you chose to install on during the installation). All you need is to chose Launch Emulator from the window displayed on the previous slide and your emulator would be ready in a few minutes. If you chose not to install an AVD, you can create one right now using the AVD Manager though you may need to download the system images using the SDK Manager. However, these virtual devices are usually slow, so you should only go for this method if you don’t have a compatible android device. If you have performance issues with the AVD, try lowering some of its specs using the AVD Manager.
YAY WE MADE SOMETHING
Now lets make more!
ClickZilla Part 2
Creating another Activity and passing data back and forth.
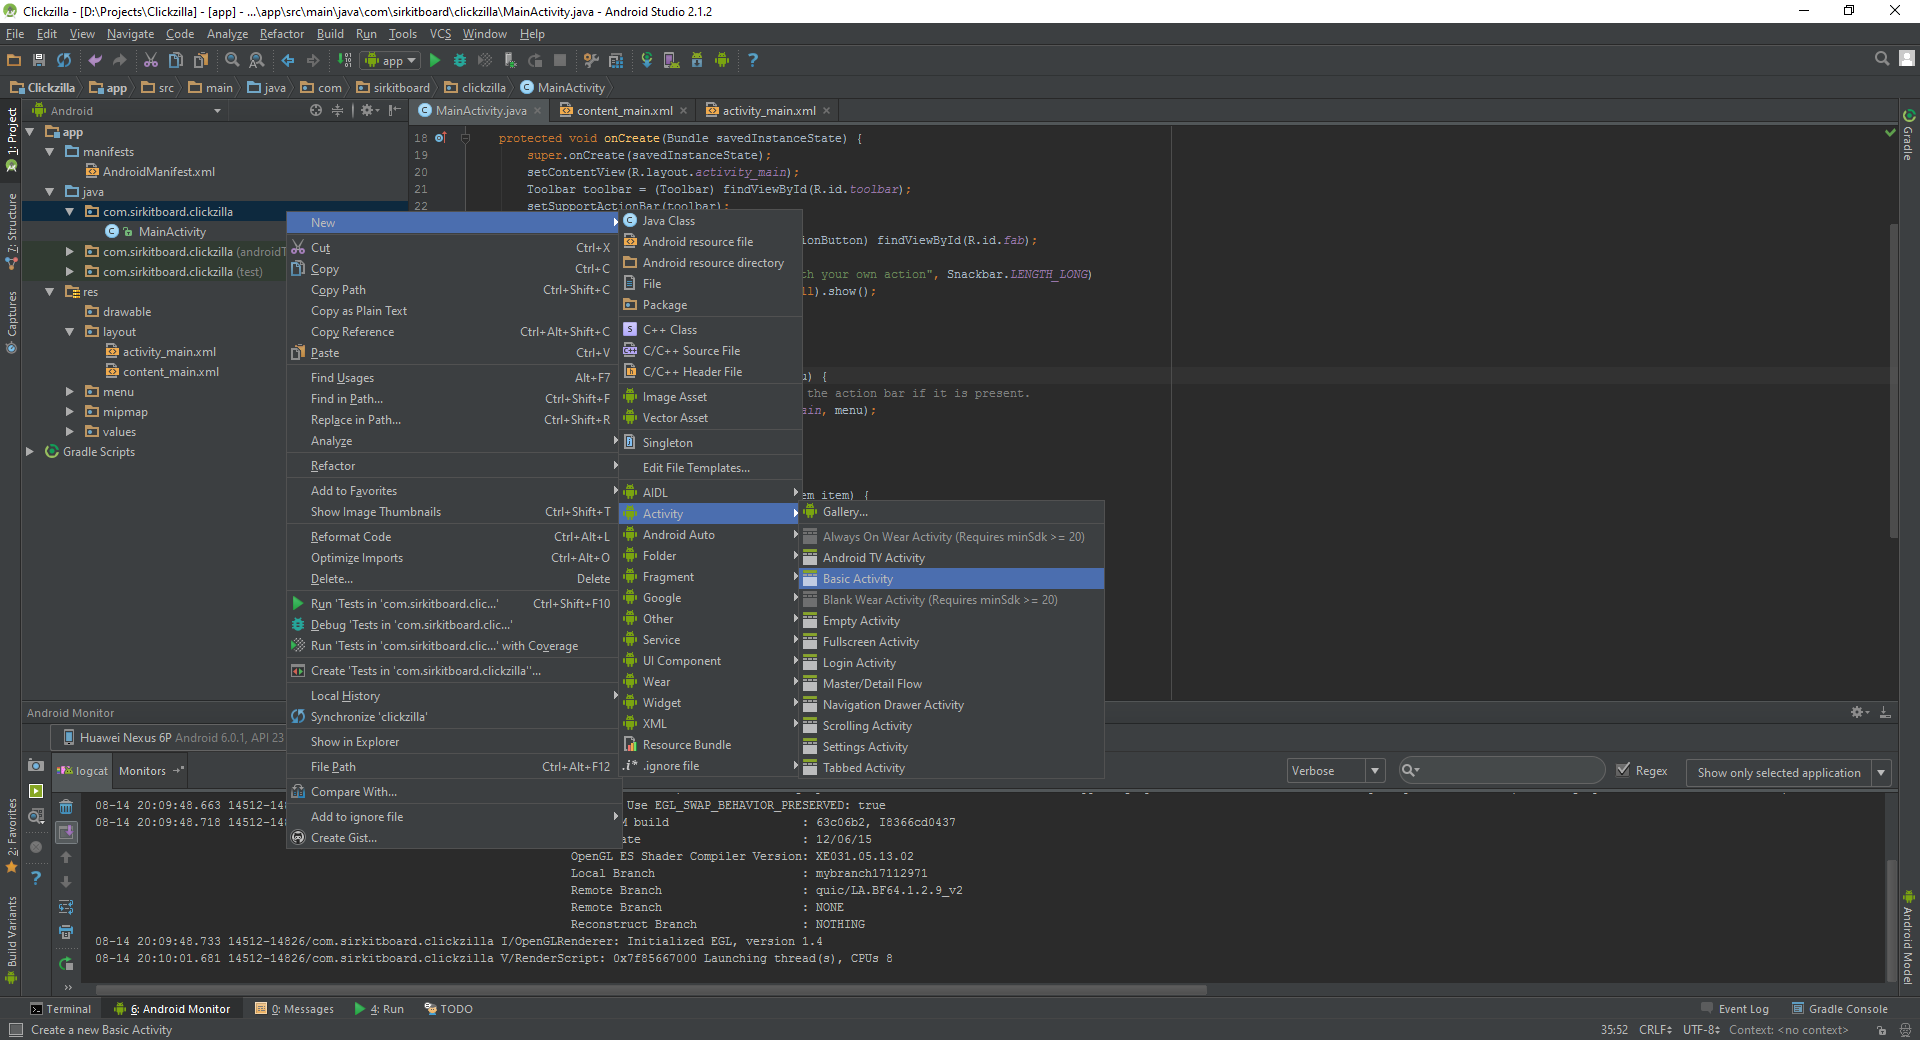
Creating Another Activity
Now that we have an activity to increment the counter, lets add another one to decrement it. So go into the porject explorer and right click anywhere and choose New > Activity > Blank Activity Name the activity as DecrememntActivity and hit finish.
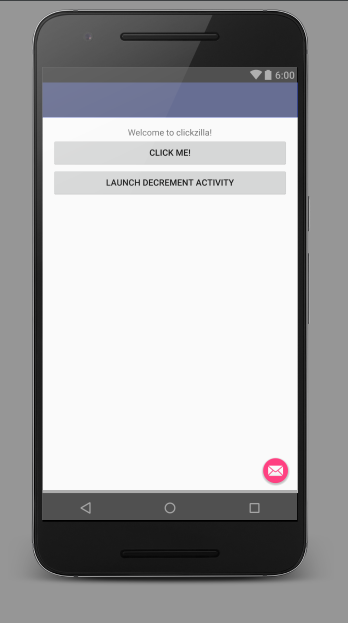
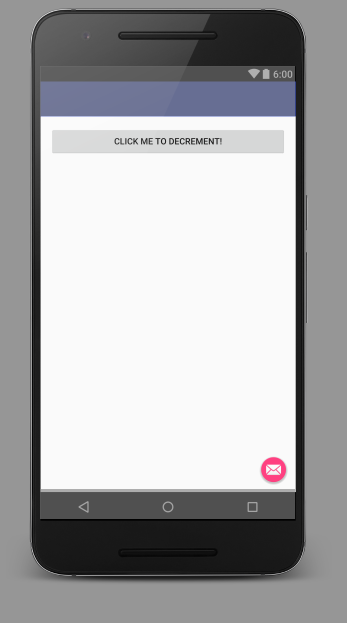
Time to use what you’ve learned
Modify the MainActivity to have another button which calls launchDecrementActivity() and modify the DecrementActivity to have a button which also calls buttonClicked(). This is what the final activities should look like:
How to launch this new Activity
So now that we have a new Activity, we want to launch this activity and send the value of the current counter to the new activity. This is handled using Intents. To launch an activity, you create and Intent for the activity and then add any extra values to the intent with a key-value pair and then simply launch the activity. To do so, put the following code as the onClick for your launchDecrementActivity button:
    public void launchDecrementActivity(View v) {
        Intent intent = new Intent(getApplicationContext(), DecrementActivity.class);
        intent.putExtra("counterValue", clickCounter);
        startActivity(intent);
    }
and modify the onCreate of the DecrementActivity to add these to lines :
Intent intent = getIntent();
clickCounter = intent.getIntExtra("counterValue",0);
And you’re all set! Don’t forget to add the buttonClicked method that actually decrements the counter :)
It Works!
If you were successful, you should have two activities that looks like this the above screenshotss
Bi-Directional Data Flow
So now that we can send data to children activities, we now need to send the data back to the parent once the activity is finished. This is handled by using Intents and the startActivityForResult() method. So first lets prep the child activity for sending the new counter value up. To do so, we override the onBackPressed of the DecrementActivity using this block of code :
    @Override
    public void onBackPressed() {
        Intent intent = new Intent();
        intent.putExtra("counterValue",clickCounter);
        setResult(RESULT_OK,intent);
        super.onBackPressed();
    }
Now, in the parent class, we replace our original startActivity(intent) with
startActivityForResult(intent,1);
and add the following method to receive the result :
    public void onActivityResult(int requestCode, int resultCode, Intent data) {
        if (requestCode == 1) {
            if(resultCode == RESULT_OK) {
                this.clickCounter = data.getIntExtra("counterValue",0);
            }
        }
    }
And you’re all Set!
YOU ARE DONE
Congratulations, you have now completed the Android Springboard Project, and can now extend this to make any app you want :-) Feel free to ask any further queries!